12.10. Apply Subsidies
A service may wish to apply a subsidy (discount) to some of their accounts. For instance, if a service has a number of children attending, whose parents are students or staff members from a nearby institution, that institution may offer to pay a subsidy to the service.
Creating a subsidy and its parameters is a reasonably lengthy process so it has been broken down into three main parts. However, once the subsidy has been implemented, it becomes a fixed entry, never needing to be adjusted unless the details of the subsidy change.
Your responsibility.
To ensure the account holder is entitled to the subsidy.
To determine the 'Method' by which this subsidy will be applied.
If your 'Method' requires it, ensure a specific 'purpose' for care exists for accounts entitled to the subsidy. (See Chapter 5, Set Purposes).
To ensure the booking details correspond with the subsidy parameters.
Steps to Creating and Implementing a New Subsidy
Select BOOKING + BILLING / CENTRE.
Select the Subsidies Tab.
Naming & Selecting a Method for your Subsidy:
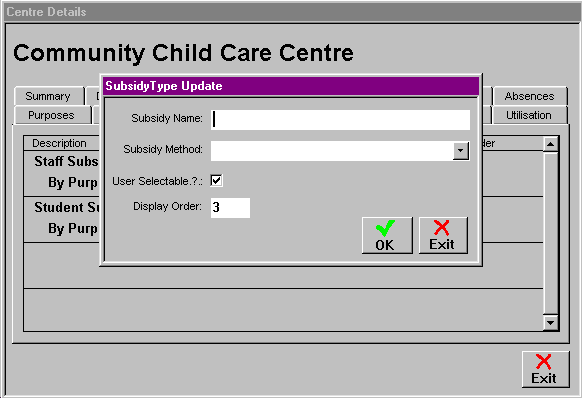
Double click on the Blank Railway Line.

Enter the name you wish to call this subsidy.
From the Draw Down Selection List, select the 'Method' that most suits your subsidy, ie. 'By Purpose By Charge Type'.
Ensure 'User Selectable' is ticked and confirm the Display Order number.
Select OK.
After selecting the Method-'By Purpose By Charge Type', you now need to enter the purpose details and some other basic parameters.
Double click on the Railway Line containing the details you have just entered.
Double click on the Blank Railway Line in the following screen.

Enter the 'effective from' and 'effective to' dates, if different to default dates.
From the Draw Down Selection List, select the specific purpose that accounts entitled to subsidy will be using, eg. staff, students.
Next to 'Transaction Category', click on NEW.
Enter a name which clearly identifies this transaction as a subsidy ie. the name of the subsidy.
Select OK.
The 'Description' defaults to the same as the category and this is what will appear on the bill.
Enter the maximum amount of subsidy, able to be given to each account per week.
Select OK.
Attach the subsidy entitlements to each of the charge types applicable.
After the last step, you should be looking at the 'Subsidy By Purposes' screen, if not, Double click on the subsidy you created.

Double click on the Railway Lines containing the Purpose details for this subsidy.
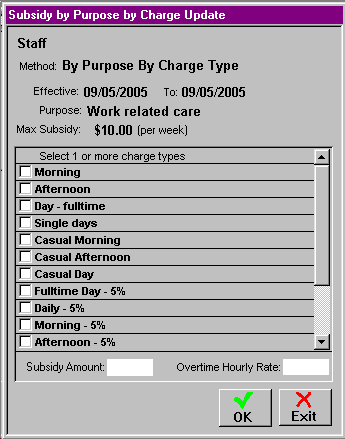
Looking at the screen, 'Subsidy By Purpose By Charge Display', Double click on the Blank Railway Line.

Tick the Check Box of each charge type entitled to same amount of subsidy.
Enter the amount these charge types can receive.
Select OK.
Repeat steps: 5.c - 5.f until all applicable charge types have an amount of subsidy attached.
Select EXIT buttons until back at main screen.